The Printer Ink Warehouse - Great Prices on Printer Cartridges, Ink & Toner Refill Kits, Bulk Ink & Toner
The Printer Ink Warehouse

Great Prices on Printer Cartridges
Ink & Toner Refill Kits  -  Bulk Ink & Toner

  thousands of satisfied customers Thousands of Satisfied Customers
 Full One Year Satisfaction Guarantee Full 1 Year Satisfaction Guarantee
 Free Shipping for Orders > $45 Free Shipping for Orders > $45
Call Us:  269-649-5492 Your Account     |     View Cart  
 
  Take Up To 15% Off Our Already Low Prices

Simply click this box to bookmark this site
 
Same-Day Shipping Guarantee
(Click for full information)
 
cartridge locator ★ Help Me Find My Cartridge
 
Toner Refill Kits Toner Refill Kits
 
Ink Refills Kits Ink Refills Kits
 
bulk toner Bulk Toner
 
bulk ink Bulk Ink
 
Cartridge Chips and Fuses Cartridge Chips and Fuses


If you are having problems with your new cartridge, try the following if...

If the printer does not accept the cartridge:  (i.e. the printer does not even know that a cartridge has been installed.  If the printer indicates that the cartridge is empty, this means that it knows the cartridge has been installed, but does not know that the cartridge has ink.)

  • Reseat the cartridge in your machine.
  • If the cartridge has an electronic chip on it, make sure it is clean by wiping it off with isopropyl (rubbing) alcohol.  Even the oil from our skin can stop a proper connection from being made between the cartridge and the machine.

  _____________________________________________________________________________

If you are having problems with the ink level of your replacement or refilled cartridge, try the following...

For ink level resets/bypasses, use the following for Canon inkjet printers:

There are 2 common methods for disabling the Canon ink level monitor:

            METHOD #1

  • Press the OK/Stop/Reset/Resume button.  If this doesn't work, press and hold the OK/Stop/Reset/Resume button in for 5-10 seconds.  (If your printer may have 1or more of these buttons, do them individually, not at the same time.)

            METHOD #2

  • You will need to locate your printers PROPERTIES or PREFERENCES.  This can be located in the status bar (near the clock on a PC), or through the Control Panel.  Locate and uncheck the option ENABLE STATUS MONITOR.  This option is usually found in a Maintenance, Custom Settings, View Printer Status, or Options tab.

  _____________________________________________________________________________

For ink level resets/bypasses, use the following for HP, Dell, and Lexmark inkjet printers:

Generally, you will want to fully read any messages being displayed on the screen.  HP printers will often tell you how to continue printing.  It will usually be accompanied with a warning that the quality of print cannot be guaranteed.  You will need to choose to accept this message.  (This message is an indication that your printer is aware that the cartridge has been refilled.  Since it is no longer considered an HP product the claim is true.  However, this does not mean that you're voiding your printers warranty, only that they will not offer support if a problem with the cartridge occurs.)

There are 2 common methods for bypassing the HP ink level monitor:

            METHOD #1

  • Follow the on screen instructions for allowing continued use of the cartridge.  If this doesn't work, press and hold the OK button for 5-10 seconds

            METHOD #2

  • Press the OK/Stop/Reset/Resume button.  If this doesn't work, press and hold the OK/Stop/Reset/Resume button in for 5-10 seconds.  (Your printer may have 1 or more of these buttons, do them individually, not at the same time.)

  _____________________________________________________________________________

For incorrect ink level readings on Epson inkjet printers:   

The following will correct ink level issues on a freshly installed Epson cartridge:  (This is a very common problem with remanufactured Epson cartridges, but following these steps has a 95%+ success rate.)

  •  Remove any cartridges that are not being accepted or showing an incorrect ink level.  Close the door covering the ink tray.  Unplug your printer for about 15 seconds.  (You will need to actually unplug the power, simply turning the printer off does not fully remove power from the printer.)  After 15 seconds, plug your printer back in, wait for it to say that the cartridges are missing, then reinstall the cartridges.

  _____________________________________________________________________________

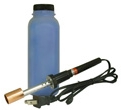
The cartridge prints poorly, or gives no print at all:

1.   Make sure you have properly removed any pull tabs that are on the cartridges.  This needs to be done on most cartridges in order for the ink to be released from the cartridge properly.

2.   If it is not working with the pull tabs completely removed, the printheads in your machine may need to be cleaned:

  • Try running your printer's printhead cleaning routine (refer to your owner's manual if you need assistance) to see if that gets your cartridge to print properly.  If this routine fixes the problem, you do not need to go any further.  If you see improvement in your prints, try running the routine again to see if it will resolve the problem for you.

    If the cleaning routine doesn't help the situation, you will want to manually clean the printhead in your machine:

  • CLICK HERE to find a great way to clean your EPSON Printheads!
  • Best way - Use an empty cartridge and fill it with printhead cleaner.  Then, run it through the "troubled" printhead by printing the associated color intensive pages to clean the printheads out of any debris, or dried ink that may be present at the jets.  If they do not clear immediately, let the solution set in the printer for a while (overnight if necessary) before you try again.  This will allow the cleaner to break down whatever is clogging the jets in the printhead.
  • If you don't have an empty cartridge, try this method:  With the cartridge out of the machine, inject our cleaning solution directly into the inlet port in the machine (This is the area in the printer that punctures the outlet port on the cartridge to draw its ink) for the color that is not printing properly.  Immediately place the cartridge back into the machine.    The cleaning solution should be allowed to sit in the inlet port a minimum of 20 minutes to allow it to break down the clog (kind of like Drano).  It may take longer than the 20 minutes, or even multiple iterations of this activity, to fully purge the debris out of the machines printhead.  If it is a tough clog, let the cleaner break it down overnight.  To check on the clog, and in an attempt to purge the debris, attempt to print a color intensive page for the problem color.

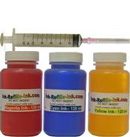
The wrong colors are being printed:

  • Try running your printhead cleaning routine on your machine.  Look at the output to see if the colors are correcting themselves.  If the output is improving, you will want to repeat the routine to resolve the problem.
  • If the machine takes individual cartridges for each color, check to make sure that the cartridges are in the proper slots in the machine.  If it does not display the proper slots for the cartridges in your machine, check your owner's manual to determine what their proper positions in the machine should be.


Troubleshooting |  Contact Information |  Frequently Asked Questions |  Return Policy / Guarantee |  Privacy Policy |  About Us |  Payments Accepted
 
Refill Accessories |  Ink Refills |  Toner Refills |  Bulk Ink |  Bulk Toner |  All Cartridges |  Laser Toner Cartridges |  Spot, Versatile & Quick Dry Cartridges